Assignments > Lab 5: Understanding Package Managers
Due on Mon, 09/23 @ 11:59PM. 6 Points.
Objective
The objective of this lab is to help you understand the concept of package management and to gain hands-on experience with various package managers, including:
- Your OS package manager:
- Mac:
brew(Homebrew) - WSL / Linux:
apt-get(APT)
- Mac:
poetry(Python) - Everyonenpm(Node.js) - Everyone
By the end of the lab, you should understand how to install, update, remove, and manage dependencies using these package managers. Learn more about each of these package managers on each project’s website:
Before you begin
Before you begin, get the latest code from class-exercises-fall2024
On GitHub:
- Sync the latest changes from the class version of
class-exercises-fall2024to your copy of the repo.On your local computer:
- Make sure that all of your changes from the last lab are staged and committed.
- Checkout your main branch:
git checkout main- Pull down the latest changes:
git pull
- If you did it correctly, you will notice that a new
lab05folder has been created.- Create a new branch called lab05:
git checkout -b lab05- Verify that you’re on your new branch:
git branch- You are going to do some coding / package manager activities within your
class-exercises-fall2024/lab05directory- After going through the lab, be sure to answer the questions in
lab05/answers.md.
Part 1(a): Homebrew (brew)
If you are a Windows user, skip this section and jump to Part 1(b).
Homebrew is a package manager for macOS that simplifies the installation of software.
1.1. Installing a Package
- Open a terminal and check if you already have
brewinstalled by typing:brew - If Homebrew is not already installed, install it by following the official installation instructions (see https://brew.sh/ for more info):
/bin/bash -c "$(curl -fsSL https://raw.githubusercontent.com/Homebrew/install/HEAD/install.sh)" - Once Homebrew is installed, use it to install
wget:
brew install wget - Verify the installation by running:
wget --version - Now that wget is installed, try coping a file from the Internet to your current working directory as follows:
wget https://www.google.comIf it worked, an
index.htmlfile should have been copied to your local directory. Use thecatcommand to view it. Then remove it using thermcommand. - Finally, list all of the packages that brew manages on your Mac as follows:
brew list
1.2. Updating and Removing Packages
- Update all installed packages using:
brew update - Uninstall
wget:
brew uninstall wget - Test that it worked by running the same
wgetcommand again. It should throw an error:
wget https://www.google.com - Now reinstall
wget:
brew install wget - Test that it worked by running the same
wgetcommand again. The Googleindex.htmlshould again be in your working directory (go ahead and delete it once you’ve verified it’s in there).
Part 1(b): APT (apt-get)
If you are a Mac user skip this section (but make sure you completed Part 1(a)).
APT is a package management system used by Debian-based Linux distributions (e.g., Ubuntu).
1.1. Installing a Package
- Open a terminal in a Debian-based Linux environment.
- Update the local package index:
sudo apt-get update - Install the
curlpackage:
sudo apt-get install curl - Verify the installation:
curl --version - Use curl to save the Google Homepage in your current directory:
curl https://www.google.com > google.html
If it worked, an google.html file should have been created to your local directory. Use the cat command to view it. Then remove it using the rm command.
1.2. Updating and Removing Packages
- Upgrade all installed packages:
sudo apt-get upgrade - Remove the
curlpackage:sudo apt-get remove curl - Test that it worked by running the same
curlcommand again. It should throw an error:
curl https://www.google.com > google.html - Now reinstall
wget:
sudo apt-get install curl - Test that it worked by running the same
curlcommand again.google.htmlshould again be in your working directory (go ahead and delete it once you’ve verified it’s in there).
Part 2 (Everyone): Poetry (Python)
Poetry is a dependency manager for Python projects that handles dependencies and packaging.
3. Creating a Python Project with Poetry
- Verify that you’re on a local branch called
lab05(git branch). If you’re not, jump to the top and re-read the “Before You Begin” section. - Check if poetry is already installed by typing
poetryat your Terminal / WSL command prompt. - If it’s not, install Poetry:
curl -sSL https://install.python-poetry.org | python3 - - Verify the installation:
poetry --version - Navigate to your
class-exercises-fall2024/lab05directory. - From within the
lab05directory, create a new Python project using Poetry:
poetry new poetry-demo
cd poetry-demo
Your file structure should look like the one below:
 class-exercises-fall2024
 ├── .git
 ├── .gitignore
 ├── README.md
 ├── lab03
 │   └── answers.md
 ├── lab04
 │   └── answers.md
 └── lab05
     ├── answers.md
     ├── node-demo
     └── poetry-demo
4. Adding Dependencies
- Add a dependency, e.g.,
requests, to the project:
poetry add requests - Check that the
requestspackage was added topyproject.tomland installed:
poetry show
5. Running the Project in a Virtual Environment
Create a new file in your poetry-demo folder called lab05-experiments.py. Paste the following starter code inside of it:
import requests

def main():
    print("hello world")
    # user_agent makes it seem like the request is coming from a web browser (versus a bot)
    user_agent = {'User-agent': 'Mozilla/5.0'}
    response = requests.get("https://new.cs.unca.edu/", headers=user_agent)
    print(response.content)

if __name__ == "__main__":
    main()
Now, run this file on the command line using the python virtual environment you just made:
poetry run python lab05-experiments.py
It should have outputted the web page from the URL given to the screen.
Now run the same python file again (outside of your virtual environment):
python lab05-experiments.py
You should see an error because requests and bs4 are not installed for your system-level python installation.
6. Install more dependencies + modify your code
Now we are going to make the beginnings of a simple web crawler that extracts all of the links from the https://new.cs.unca.edu/ page, using another package called beautiful soup. To do this, you will install “Beautiful Soup” – a python module with various utilities that makes it easy to extract items from web pages. Please do the following:
- Install the
bs4package using poetry - Modify the
mainfunction inside oflab05-experiments.pyso that it only output the URLs of any links on the CS homepage.
If you wrote your code correctly, this should be the output (there should be around 85 links total):
https://unca.edu
https://new.unca.edu/admission/apply/
/
https://new.cs.unca.edu/our-mission/
https://new.cs.unca.edu/our-programs/
https://new.cs.unca.edu/computer-systems-major/
...
Hints:
- Make sure you import Beautiful soup at the top of your python file:
from bs4 import BeautifulSoup - Create a BeautifulSoup object from the HTML:
soup = BeautifulSoup(response.content, 'html.parser') - Use the built-in BeautifulSoup functions to extract all of the links. Feel free to ask Google or Chat GPT something like: “How to I extract URLs using beautiful soup?”
7. Removing Dependencies
- Remove the
requestsandbs4packages from the project:
poetry remove requests poetry remove bs4 - Try running your python script again:
poetry run python lab05-experiments.pyWhat happened?
- Add
requestsandbs4back:
poetry add requests poetry add bs4 - Try running your python script again:
poetry run python lab05-experiments.pyWhat happened?
Part 3 (Everyone): npm (Node.js)
npm is the default package manager for Node.js. It helps manage project dependencies. Before you begin, check to see whether node is already installed by running the following on the command line:
node -v
- If your version of Node is less than version 18x, talk to Sarah.
- If Node.js is not installed, follow the installation instructions for your respective OS
- Otherwise, skip down to 7
Installation Instructions
Mac
Use brew:
brew install node
node -v
Ubuntu / WSL
Because apt has a very outdated node version, you’re going to add a new debian source so that apt can pull down a more recent version of node. The specific instructions you want are as follows:
sudo apt-get install -y curl
curl -fsSL https://deb.nodesource.com/setup_22.x -o nodesource_setup.sh
sudo -E bash nodesource_setup.sh
sudo apt-get install -y nodejs
node -v
Source: https://github.com/nodesource/distributions/blob/master/README.md
8. Initializing a Node.js Project
- Open a terminal and navigate into the
lab05/node-demofolder. Note that there are already some files in this folder for a “starter” React project. However, the underlying dependencies are not installed. Then, from within thenode-demofolder, initialize a new node project using the node package manager:
npm init -yThe
npm initcommand should have created two new files withinnode-demo:package.jsonand ` package-lock.json`. Verify this.
9. Install the React and Vite Dependencies
- Install the
react,react-dom, andvitepackages through the node package manager as shown below:
npm install react react-dom vite - Verify that the package was installed by checking the
node_modulesfolder andpackage.jsonfile. - Modify the
package.jsonfile by replacing the entire “scripts” entry with this one:
"scripts": { "start": "vite", "build": "vite build", "serve": "vite preview" }, - When you’re done, issue the following command in the terminal from within your
node-demofolder:npm startThen navigate to http://localhost:5173/ in your web browser.
If you did everything correctly, you should see a simple screen that says Hello world!
10. Add a new dependency
Now that you have a working react app, stop your vite process (Control + C on the Terminal). We will now install a design system package called “Ant”, which includes some nice react widgets that we can use to accelerate our development process:
npm install antd
Now, open src/App.js and replace the current code with this code:
import React, { useState } from "react";
import { Button, Modal } from "antd";
const App = () => {
    const [isModalOpen, setIsModalOpen] = useState(false);
    const showModal = () => {
        setIsModalOpen(true);
    };
    const handleOk = () => {
        setIsModalOpen(false);
    };
    const handleCancel = () => {
        setIsModalOpen(false);
    };
    return (
        <>
            <Button type="primary" onClick={showModal}>
                Open Modal
            </Button>
            <Modal
                title="Basic Modal"
                open={isModalOpen}
                onOk={handleOk}
                onCancel={handleCancel}
            >
                <img
                    alt="example"
                    src="https://picsum.photos/400/300"
                    width="400"
                    height="300"
                    style={
                        {
                            width: "100%",
                        }
                    }
                />
                <p>Some contents...</p>
                <p>Some contents...</p>
                <p>Some contents...</p>
            </Modal>
        </>
    );
};
export default App;
Finally, run your react app again…
npm start
…and then navigate to http://localhost:5173/.
If you did it correctly, you should see a modal:
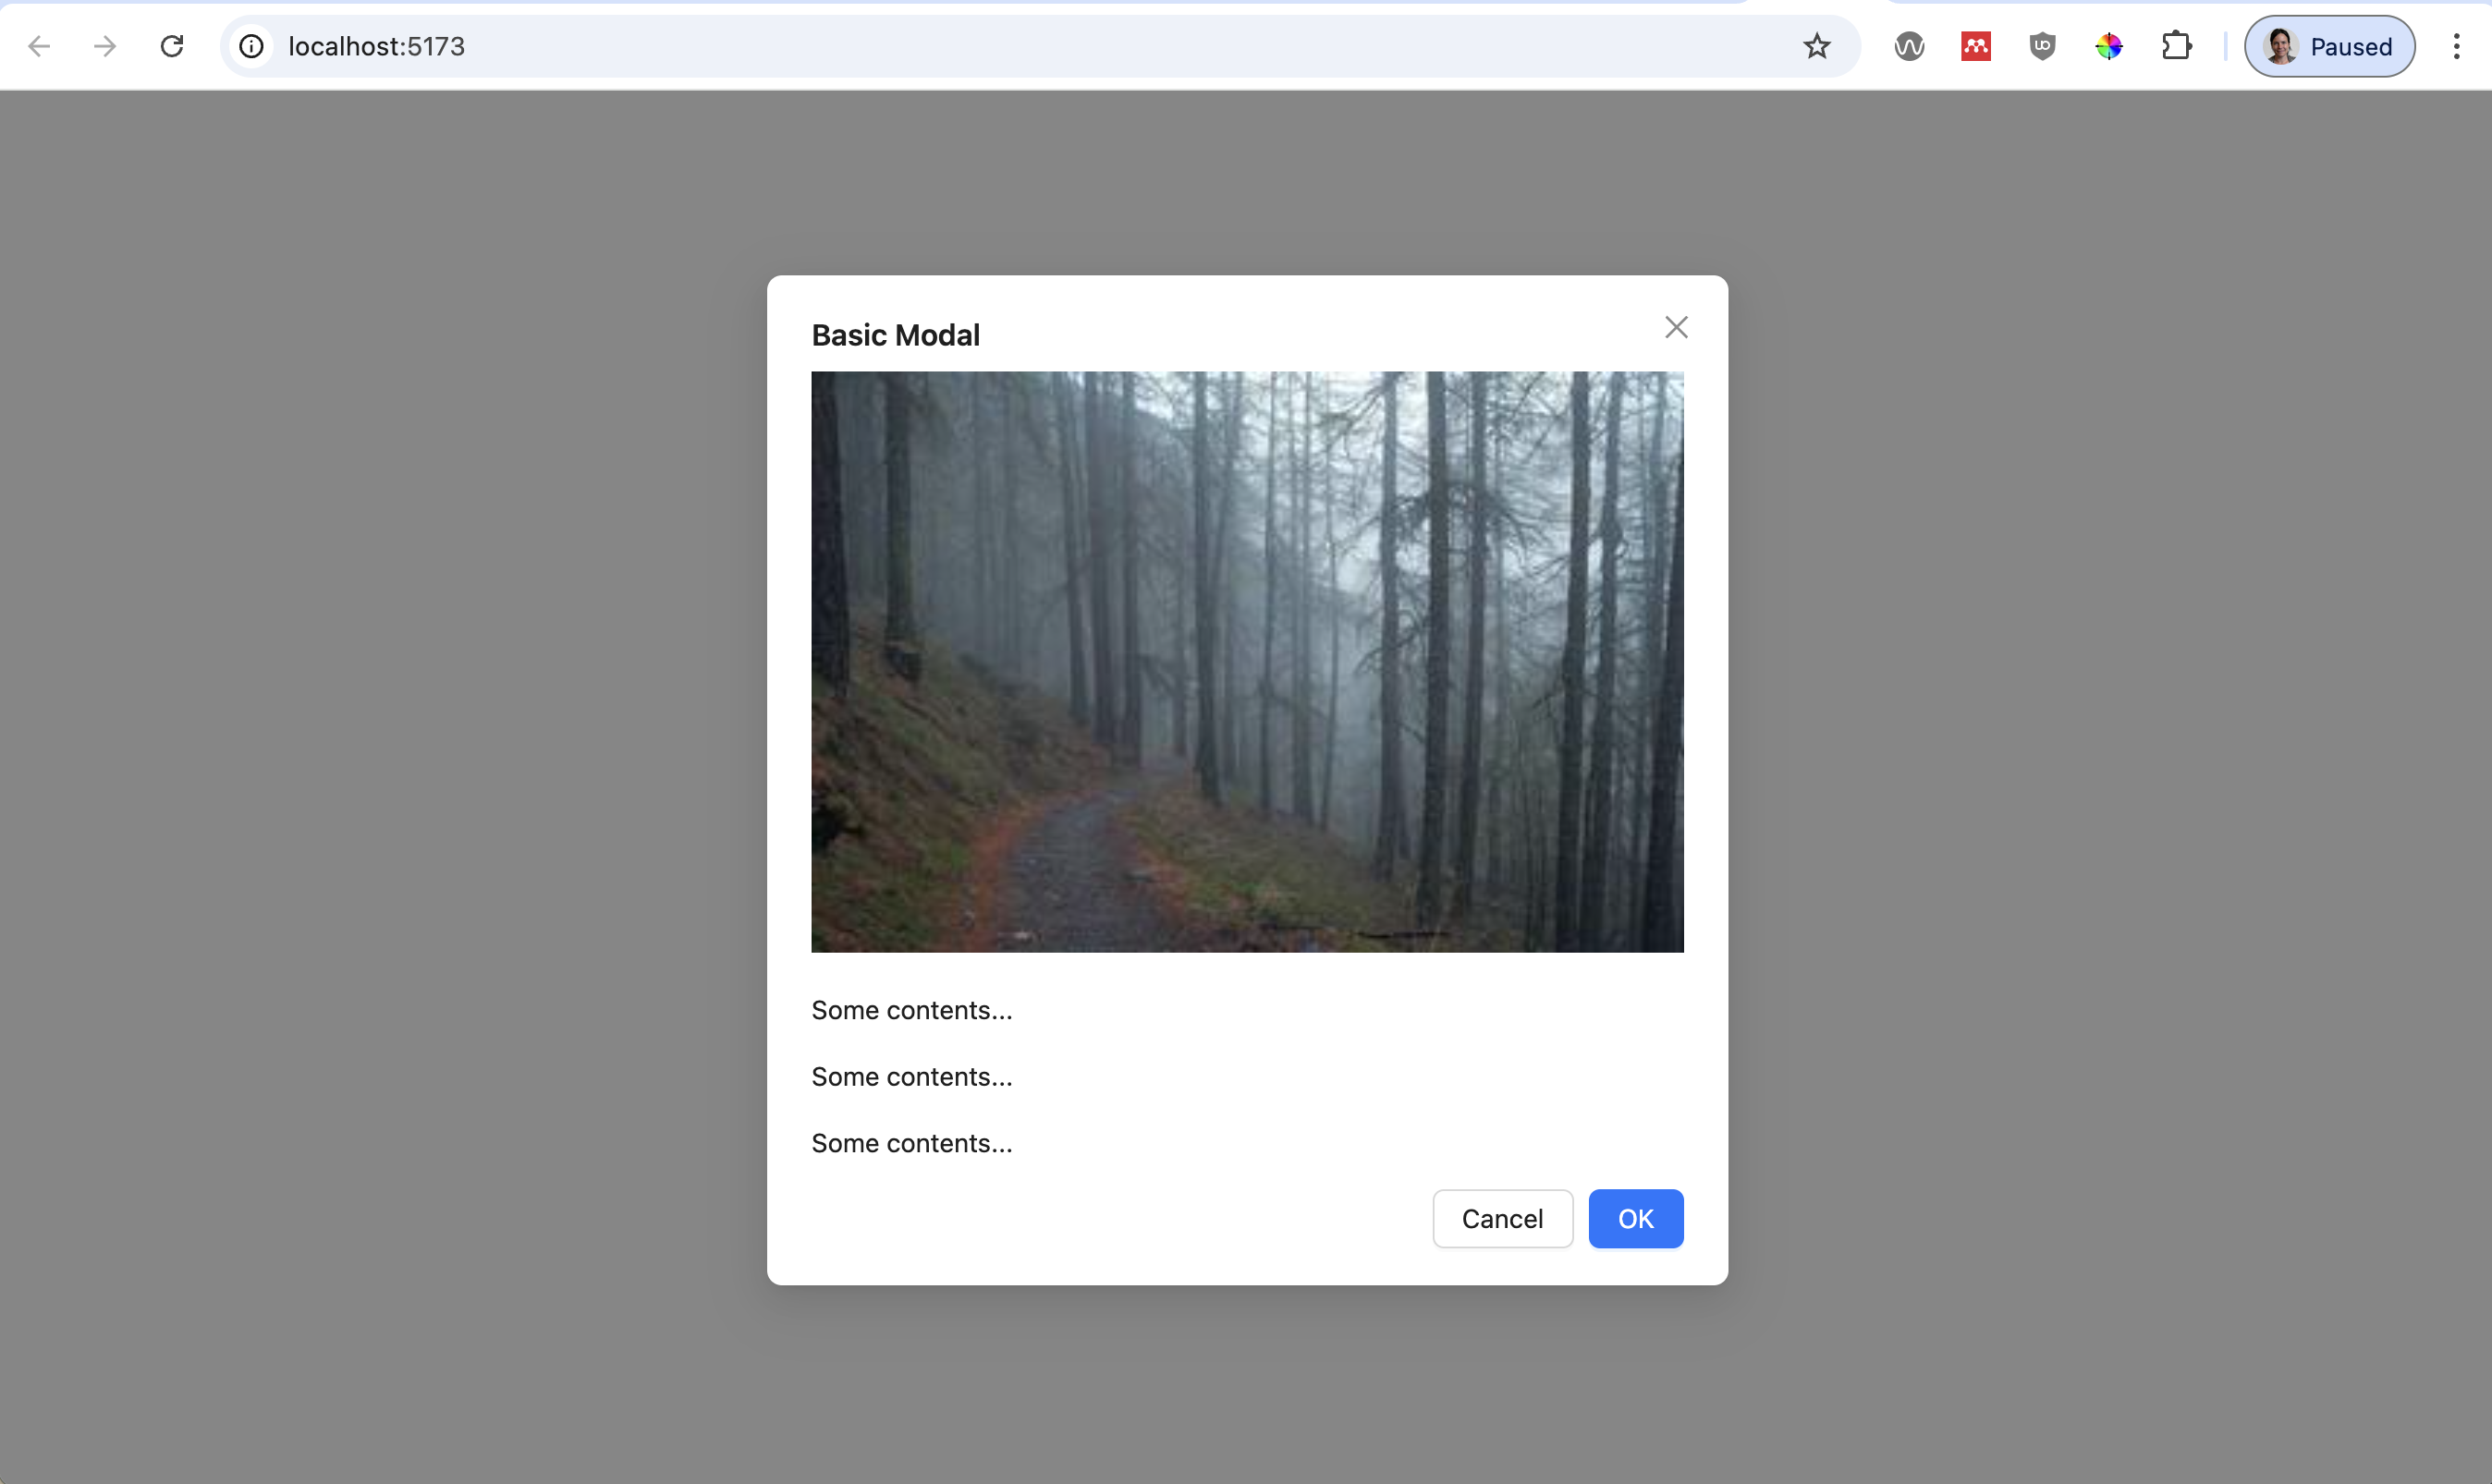
If you are new to web development, this modal may not look like much, but building components like modals from scratch is a pain! Thanks to the React components built into the Ant Design System (and there are many other design systems out there), we can just import some packages and hit the ground running!
Part 4: Answer the Discussion Questions
Please answer all of the discussion questions in the class-exercises-fall2024/lab05/answers.md file.
Submission
Please verify that you completed the Lab 5 tasks:
- You experimented with your operating system’s package manager (Part 1)
- You created a python app in poetry that extracts and prints URLs from the UNCA Computer Science homepage (Part 2)
- You have created an interactive modal box using React (Part 3)
- You have answered all of the questions in
answers.md.
Then, push your lab05 branch to GitHub and make a pull request. Please ensure that the destination (left-hand side) is pointing to the main branch of your repo and the source (right-hand side) is pointing to the lab05 branch of your repo
Paste a link to your repo in the Moodle submission.